Refresh Access Token
Access tokens expire after some time. This topic describes how to update them.
Basics
There are two ways to update an access token: use a refresh token, or repeat the process of getting an access token through the consent screen.
Refresh token
When an authorization server issues an access token, it may also issue a refresh token. ReadyAPI stores the refresh token in the project file, so when the access token expires, ReadyAPI can send it to the authorization server to get a new access token.
Important
ReadyAPI does not support getting a refresh token from Google, because it does not support sending the access_type and prompt parameters required for that.
Consent screen
If ReadyAPI does not issue a refresh token or it expires, repeat the process of getting an access token the same way you got it the first time, using one of the OAuth 2.0 grant types.
Tip
ReadyAPI can simulate the required actions, so it can obtain a new access token in unattended mode. To learn more, see Automation Script.
Process overview
How ReadyAPI processes an access token depends on several aspects:
Whether the Refresh Access Token option is set to Automatic or Manual.
Whether a valid refresh token exists.
Whether the automation script is configured.
Refresh Access Token | ||
Automatic | Manual | |
Refresh token exists | ReadyAPI automatically updates the access token using the refresh token. | Click Refresh to update the access token using the refresh token. |
There is no valid refresh token | ReadyAPI opens the consent screen. You need to repeat the process of getting an access token. | Open the Get Access Token dialog and repeat the process of getting an access token. |
In both cases, if a configured automation script is available, ReadyAPI uses it to simulate interaction with the consent screen. | ||
Below, we describe each of these scenarios in detail.
When does ReadyAPI start refreshing an access token?
There are two ways to trigger the access token update process:
In Automatic mode, ReadyAPI starts the process when the access token expires. This is the default behavior.
In Manual mode, you need to start the process manually.
How to configure the behavior?
Click Advanced when selecting the OAuth 2.0 profile in the Auth manager or in the Auth panel.
Set the needed mode in the Refresh Access Token option:
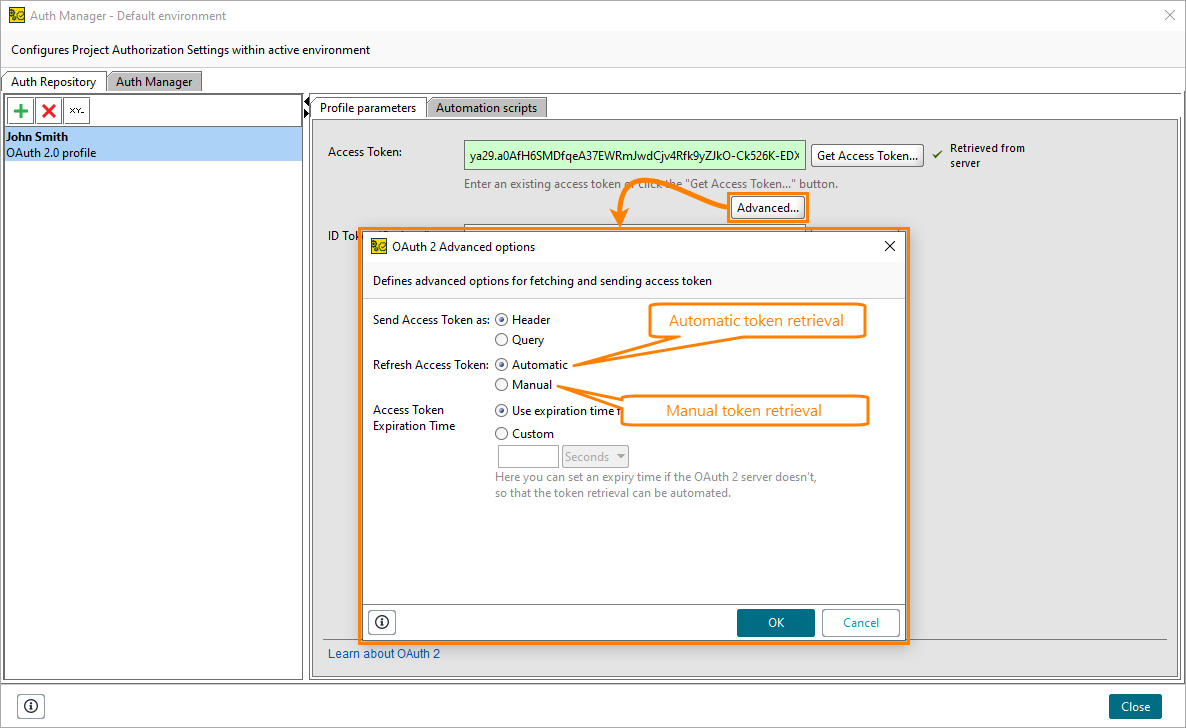
Automatic mode
Use a refresh token
If there is a refresh token, ReadyAPI uses it to get a new access token in the background when you send a request with the expired access token.
Get a new access token
If there is no refresh token, or it has expired, ReadyAPI shows the login and consent screens. If you configured the automation script, ReadyAPI runs it to simulate the needed actions. Otherwise, go through the login and consent screens manually to get an access token.
Note
Do not confuse the Automatic mode of the Refresh Access Token option and the automation script. The Refresh Access Token option controls when ReadyAPI triggers an access token update, while the automation script simulates the required actions on the login and consent screens.
Manual mode
Use a refresh token
If a refresh token is available, ReadyAPI shows the Refresh button in the Auth Manager and the Auth Panel. Click the button to refresh an access token.
Important
The button does not appear if there is no refresh token.
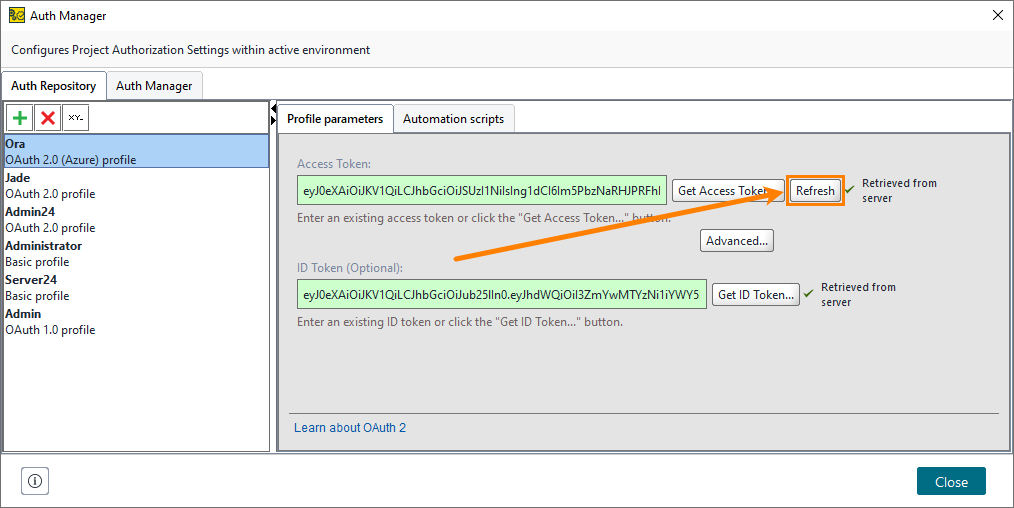 |
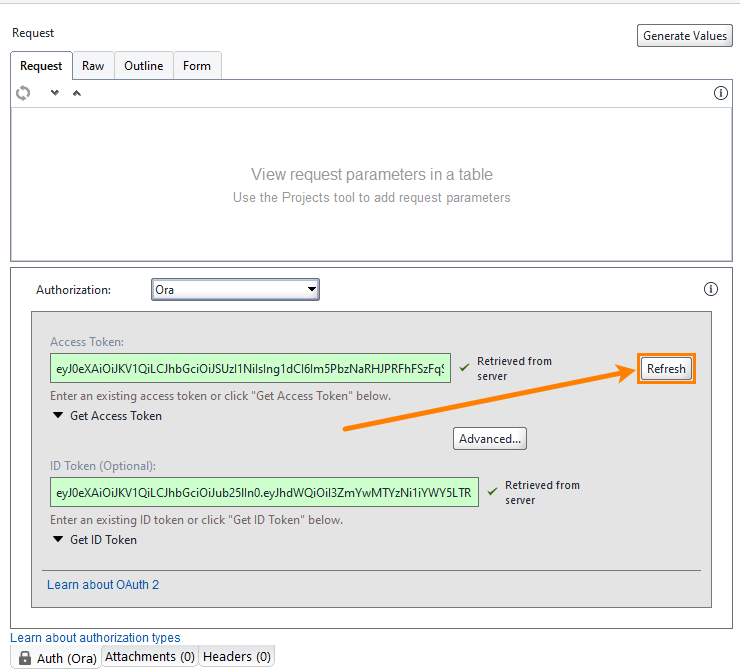 |
Get a new access token
Get a new access token the same way you did the first time, using the corresponding OAuth 2.0 grant type.
Tip
If you configure the automation script, ReadyAPI performs the needed actions in the login and consent screens even if you set the Refresh Access Token option to Manual.