Getting Started
This page walks you through installing the ReadyAPI MCP Plugin and authenticating your first connection. Complete these steps before connecting any MCP client.
Prerequisites
Confirm that you meet the following requirements before installing the plugin.
Requirement | Details |
|---|---|
ReadyAPI | Version 4.1.0 or later, with a valid license |
Operating System | Windows 10/11, macOS 12+, or Ubuntu 20.04+ |
Java | JVM 21 or later (bundled with ReadyAPI) |
Network | Localhost access on TCP port |
MCP Client | Any MCP-compatible client - Claude Desktop, Claude Code, VS Code + Copilot, Cursor, and so on |
Install the plugin
For an overview of the Integrations tab, see Integrations Tab.
Open ReadyAPI and click Integrations.
Search for ReadyAPI MCP Plugin in the plugin marketplace.
Click Install.
ReadyAPI downloads and activates the plugin without requiring a restart.
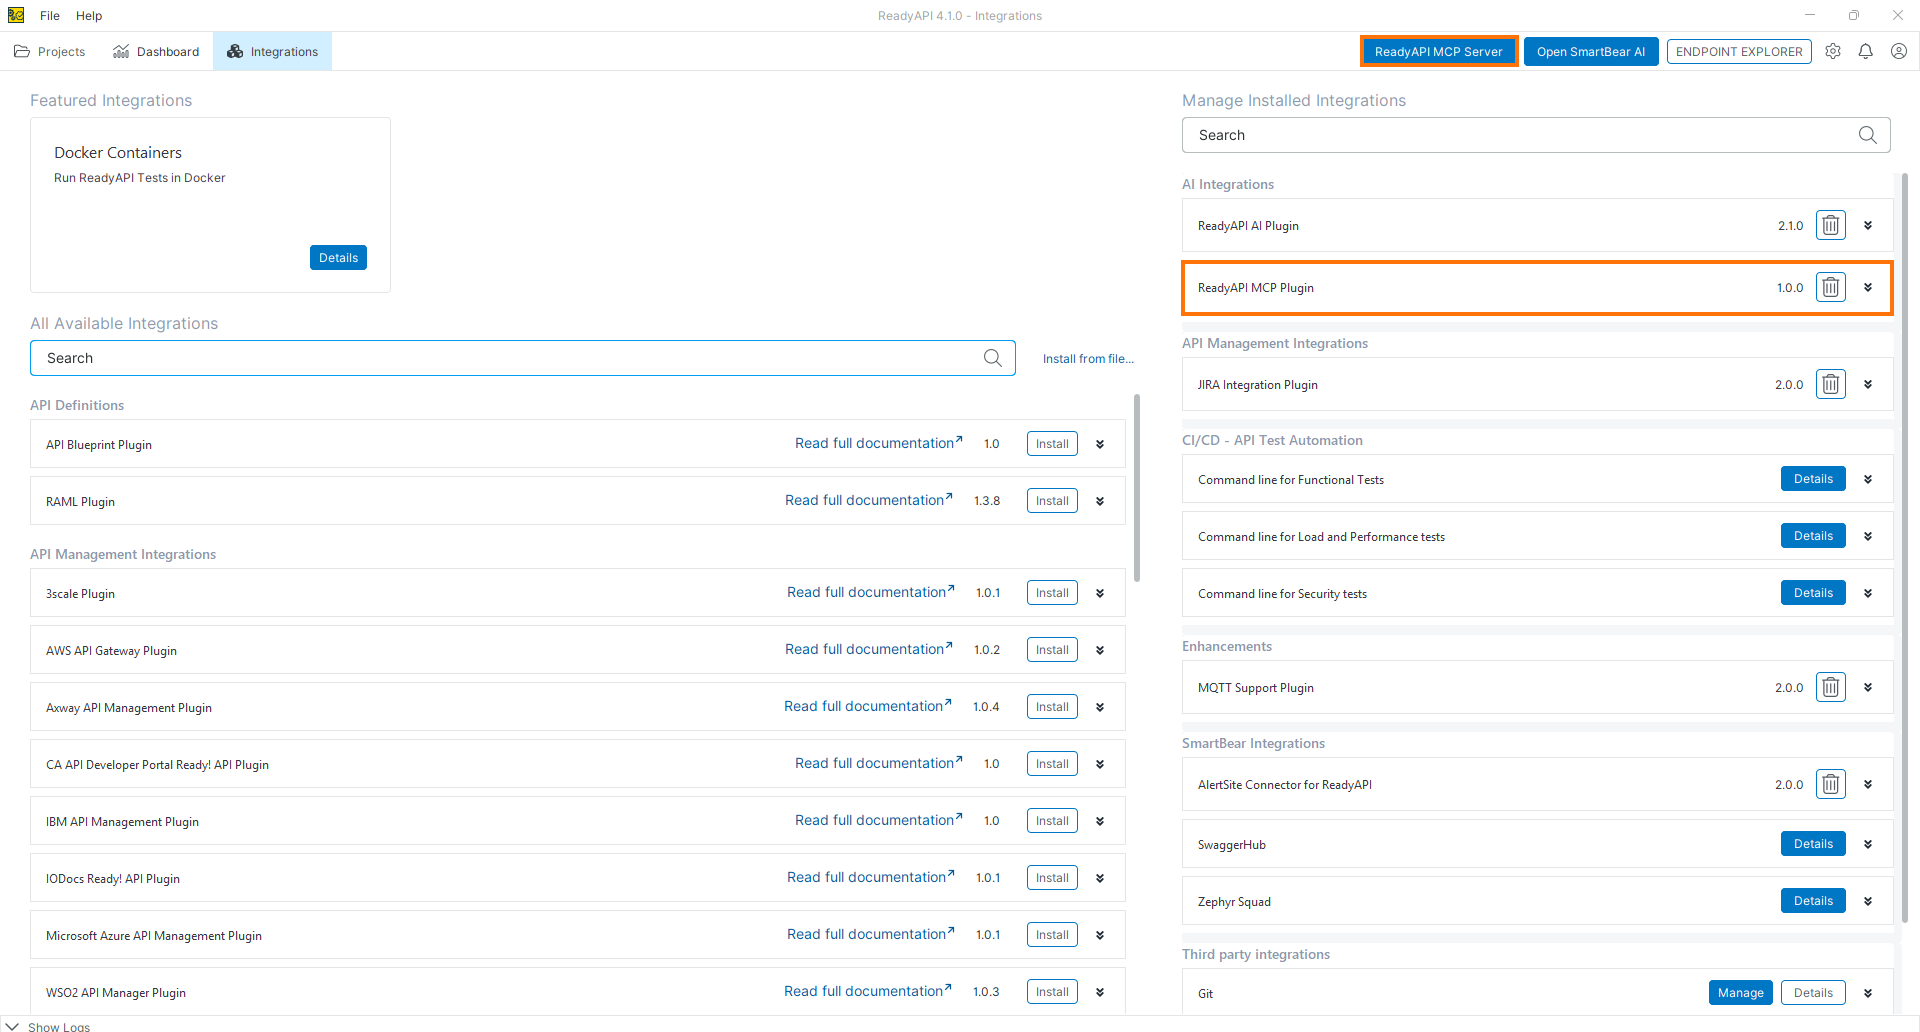
Once installed, the MCP Server starts automatically when ReadyAPI launches and binds to:
http://127.0.0.1:2015/mcp
or
(or http://localhost:2015/mcp)
Note
The MCP Server is exclusively local. It binds to 127.0.0.1 only and is not accessible from other machines on the network. This is a deliberate security constraint and cannot be changed.
Set up authentication
The ReadyAPI MCP Server uses bearer token authentication to block unauthorized access from browser-based scripts or other processes running on the same machine.
When you install the plugin, it generates a cryptographically random token (UUIDv4, 122 bits of entropy), encrypts it at rest, and stores it locally within the application - not in the OS credential manager.
To retrieve your token, follow these steps:
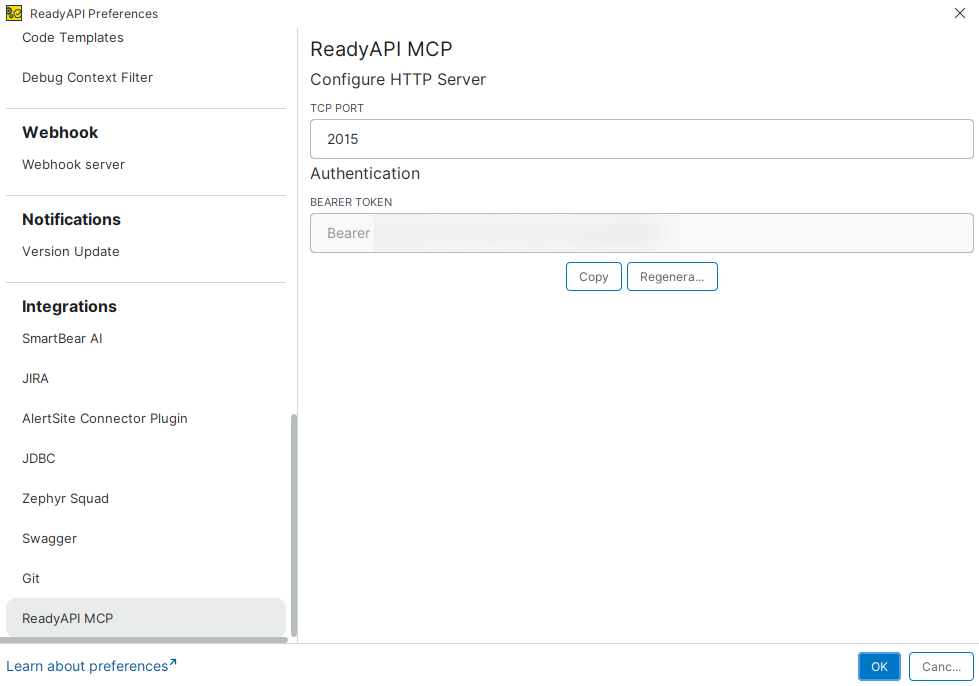
Go to Preferences, Integrations, and then ReadyAPI MCP.
In the Authentication section, under BEARER TOKEN, click Copy and paste the token into your MCP client configuration. See Connect an MCP Client for client-specific instructions.
Warning
Treat the bearer token like a password. Do not commit the MCP client configuration files containing this token to version control. If a token is compromised, click Regenerate in the plugin settings. This invalidates the existing token immediately - update all connected clients with the new token.
Configure the server port (optional)
By default, the MCP Server listens on port 2015. To use a different port, follow these steps:
Go to Preferences, Integrations, and then ReadyAPI MCP.
In the ReadyAPI Preferences dialog, in the Configure HTTP Server section, set the TCP PORT field to your preferred value.
Update the server URL in all connected MCP client configurations to match the new port.
Manage agent connections
The MCP Plugin provides controls for managing active agent connections in the ReadyAPI MCP Server dialog in ReadyAPI.
To disconnect all currently connected AI agents, click Detach agents.
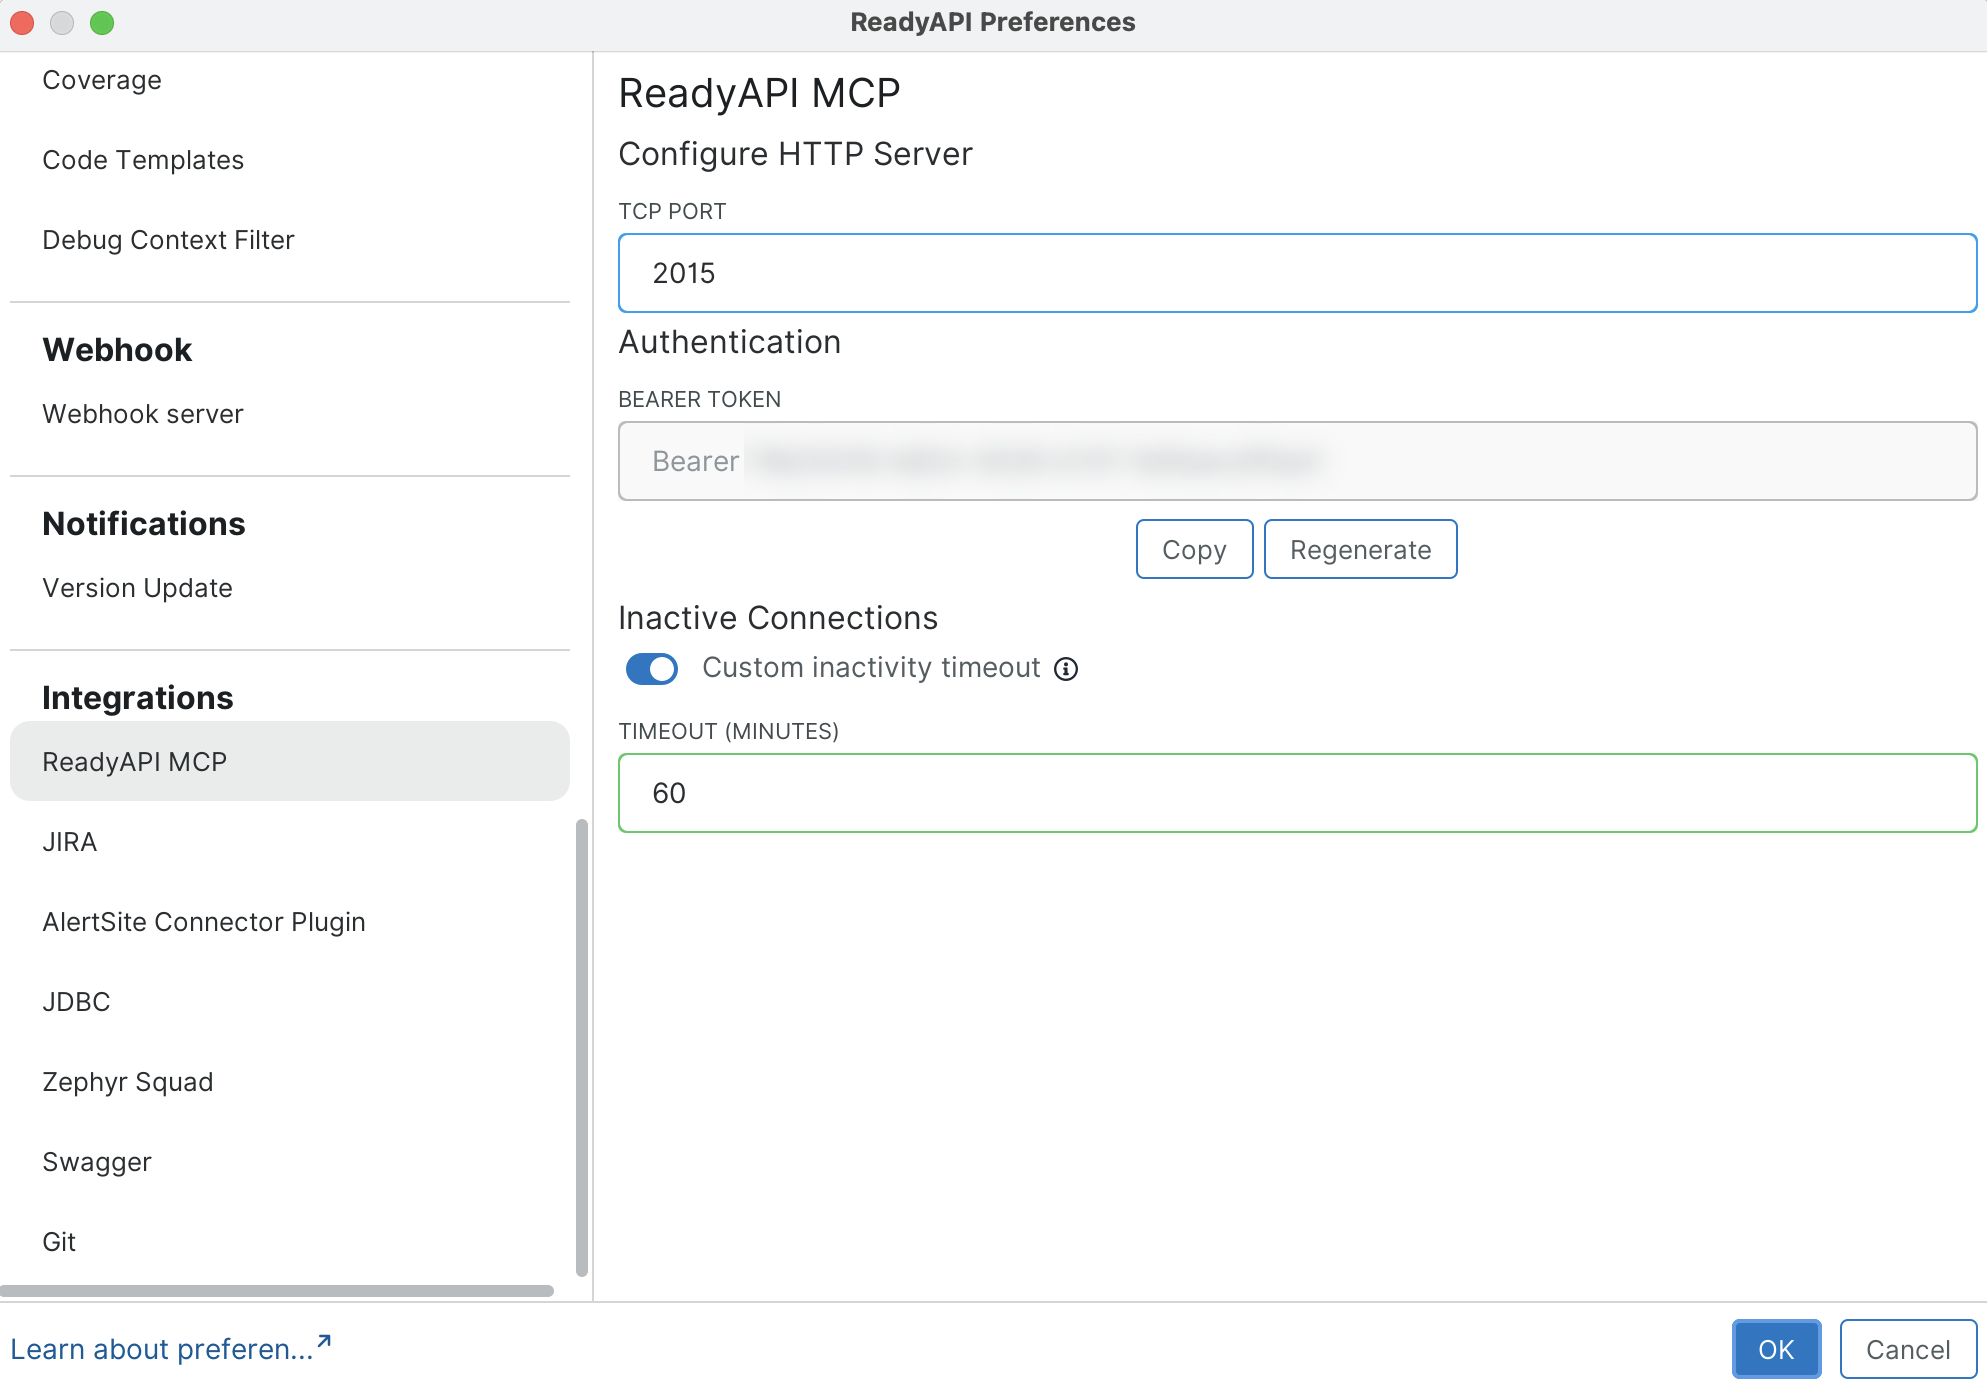
ReadyAPI automatically detaches agents after 10 minutes of inactivity, preventing inactive connections from remaining open indefinitely. To extend this default, go to Preferences, Integrations, and then ReadyAPI MCP. In the Inactive Connections section, use the Custom inactivity timeout toggle to enable a custom timeout and enter your preferred value in the Timeout (minutes) field. The maximum allowed time is 1440 minutes (24 hours). Once detached, an agent must reconnect before it can send further requests.
 |