Distribution Page
Click the Distribution tab to create load tests that run on one or more remote machines.
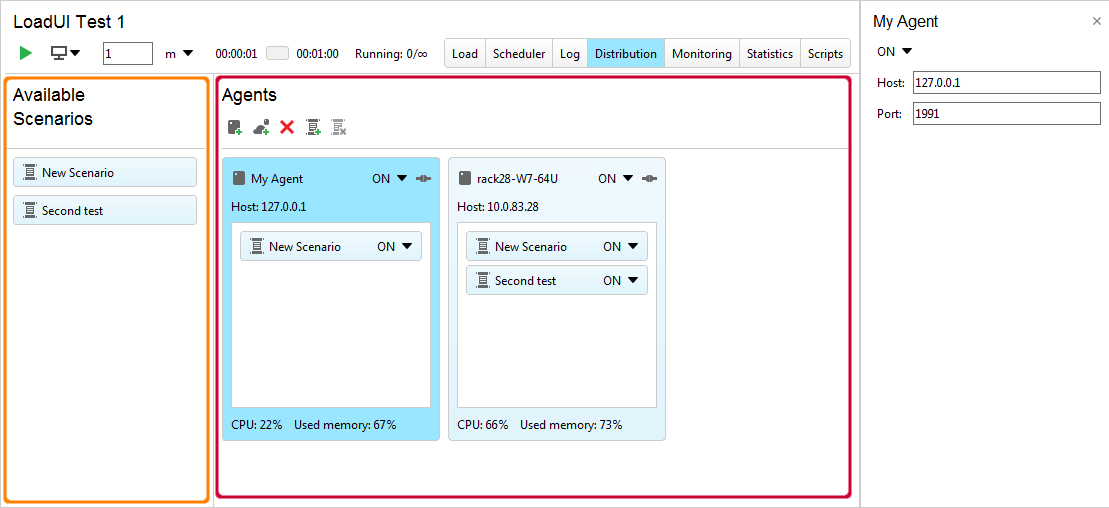
The Available Scenarios panel displays all scenarios available in the load test. You can drag these scenarios to agents to add them to the distributed test.
In the Agents panel, you work with agents. You can create and delete agents. To edit an agent, select it and change its properties.
 |
For additional information about working with distributed tests, see the following table:
To learn more about | See these topics |
|---|---|
Creating distributed tests in ReadyAPI | |
Installing the LoadUI agent application | |
Load testing |
To Add an Agent
In the Agents panel, click Add Agent or Add Cloud Agent.
In the Add Agent dialog, enter a name for the agent in the Name field.
Enter the agent’s host address in the Host field and the port number in the Port field.
Click OK.
To Assign Scenarios to an Agent
In the Agents panel, select the agent you want to assign scenarios to.
Click the Assign scenarios icon in the Agents toolbar.
In the Add Scenarios to Agent dialog, select the scenarios you want to assign.
Click OK.
Note
You can also drag scenarios from the Available Scenarios panel directly onto the agent.
To Enable or Disable the Agent
Select the value you need in the Enable toggle next to the agent name.
To Enable or Disable a Scenario in the Agent
Select the value you need in the Enable toggle next to the scenario name.