Enabling OAuth 2.0 Authentication with Azure Active Directory
When you use OAuth 2.0 authentication, you get access to a web service from a client application. The grant type you use determines how you do this. This tutorial shows how to configure the Client Credentials grant type for applications in Azure Active Directory. The client application accesses the web service using its own credentials.
1. Register applications in Azure Active Directory
To perform OAuth 2.0 authentication using the client credentials grant type, register both the web service and the client application in Azure Active Directory. For details, see the Microsoft documentation.
2. Configure a client application
A client application is an application that requests a protected resource. After you register it in Azure Active Directory, follow these steps to apply the client credentials grant type:
Open the Azure Active Directory service. In App registrations, open the registration for your client application.
Copy the Application (client) ID and save it. You need this value to link the client to the web service and to configure the request authentication.
In the Client Credentials Grant type, you need a client secret. To obtain it, open the Certificates & secrets and click New client secret.
Add a short description and click Add.
Copy the generated value and save it in a safe place.
Important
You cannot retrieve the client secret after you leave the Certificates & secrets page.
3. Configure a web service application
To configure a web service application, authorize your client application. Follow these steps:
Open the Azure Active Directory service. In App registrations, open the registration for your web service application.
Open the Expose an API page.
Set the Application ID URI.
When you authorize a client, specify the scope to restrict client access. To define the scope, click Add a scope and configure it as needed.
To authorize the client application, click Add a client application and enter the Application ID you copied earlier.
4. Configure a request authentication
Configure authentication for a protected resource:
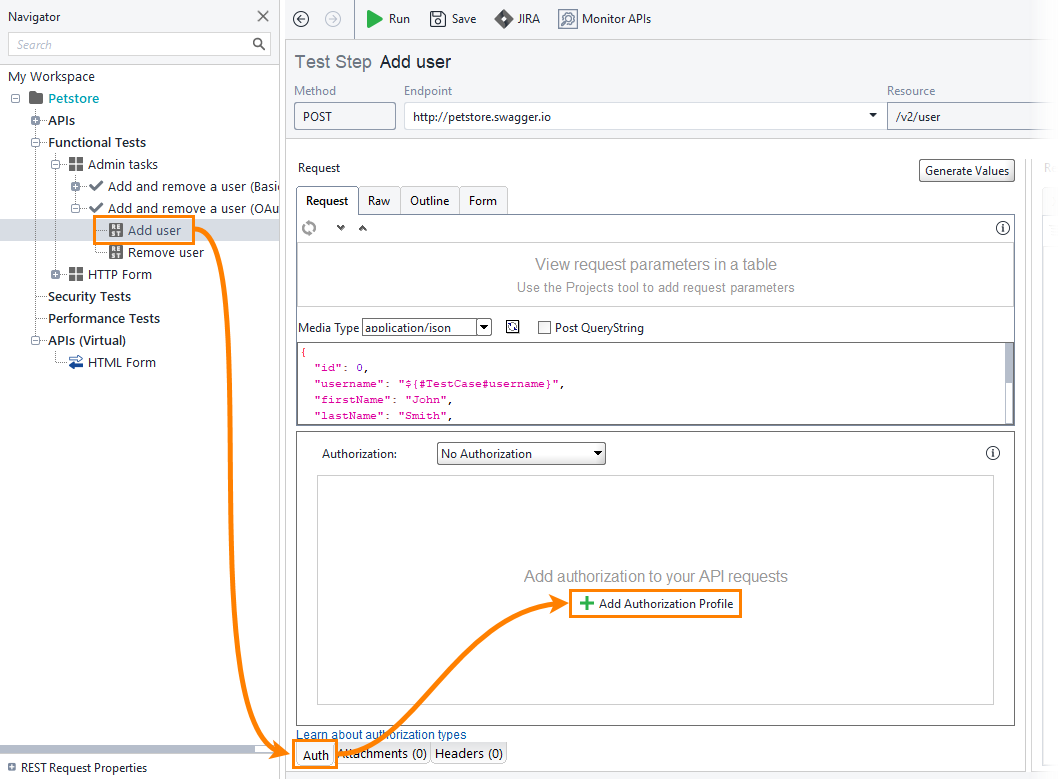
In ReadyAPI, open a REST request.
Open the Auth panel and click Add Authorization Profile.
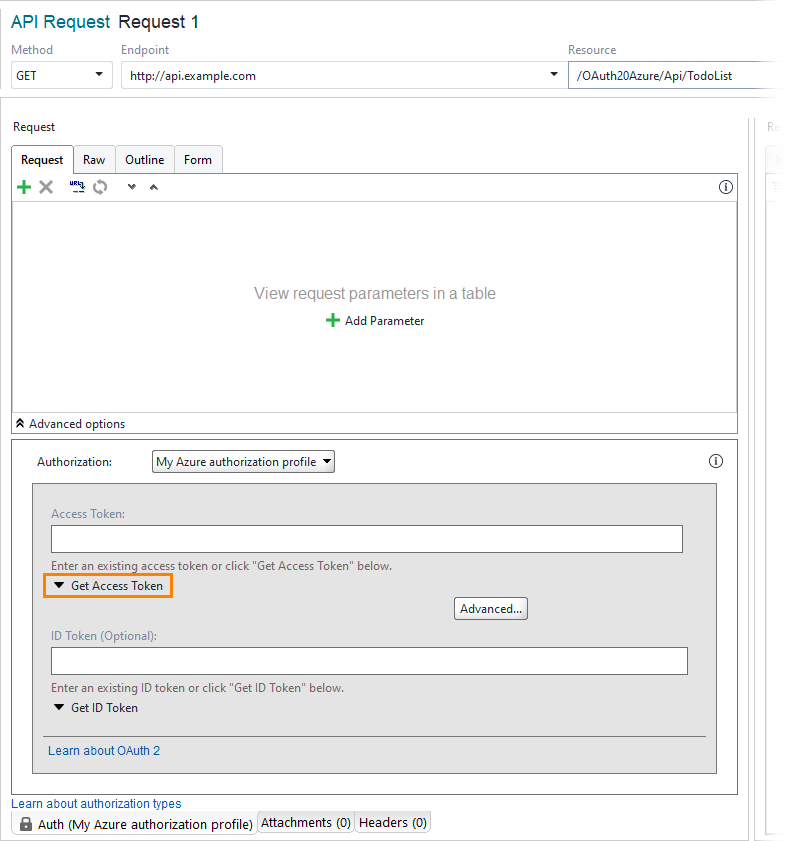
Select the OAuth 2.0 (Azure) authorization type.
ReadyAPI creates a profile and applies it to the request.
Click Get Access Token to configure authentication and retrieve an access token.
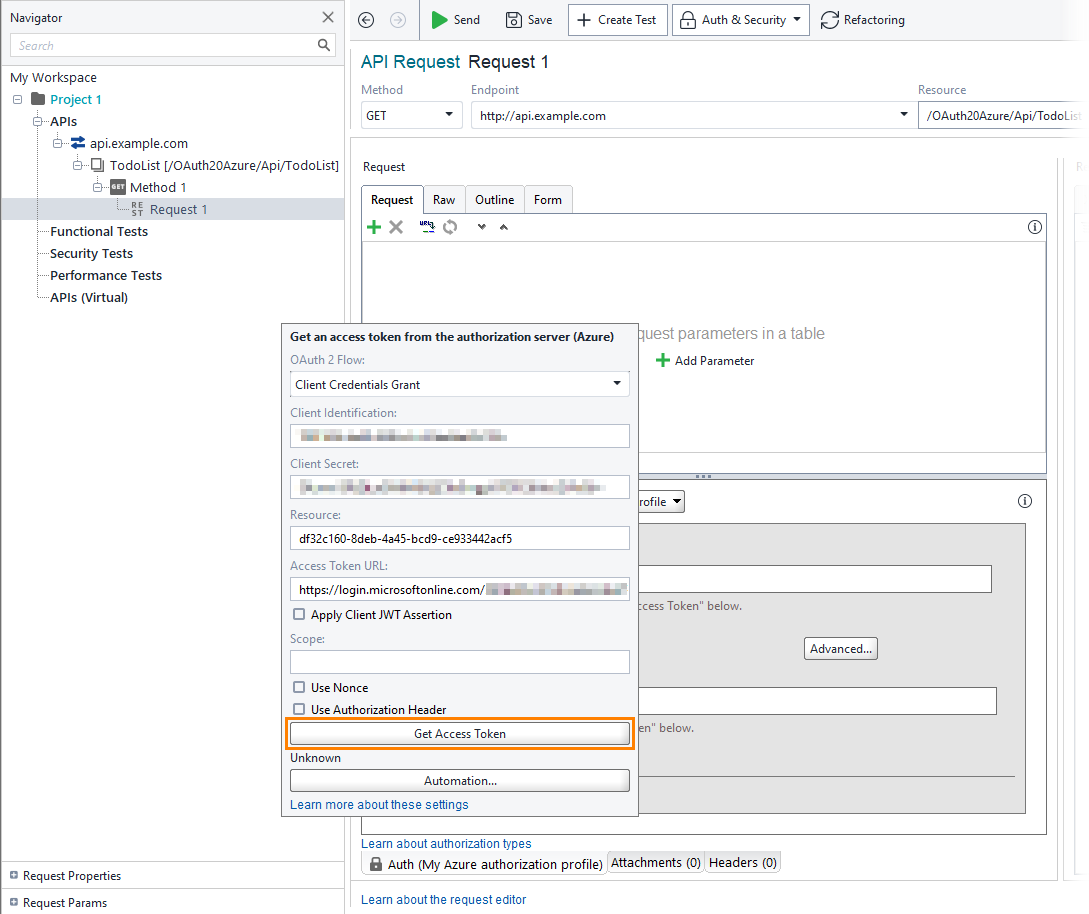
In the Get access token from the authorization server form, select Client Credentials Grant and fill in the required fields. Use the values from Azure Active Directory.
Table 50. Client Credentials Grant - Required Field ValuesField
Description
Client identification
The application ID of your client application. Find it on Overview page of your application in the Azure Active Directory.
Client Secret
The client secret you created in 2. Configure a client application. Find it on the Certificates & Secrets page of your application in the Azure Active Directory.
Resource
The Application ID URI of the protected web service. Find it on the Overview page for your API application in Azure Active Directory.
Access Token URL
The URL ReadyAPI uses to request an access token. For example:
https://login.microsoftonline.com/<your-tenant-id>/oauth2/token
To obtain it, open your Azure Active Directory and click Endpoints.
Tip
Some properties in this tutorial are optional. For details, see Client Credentials Grant.
Click Get Access Token to retrieve the token. When you send the request, ReadyAPI uses the access token to authenticate it.