Simulating Producers
Producing events is one part of message exchange in Kafka, the other being consuming events. You can use ReadyAPI to simulate an event producer and post events to topics on your Kafka broker.
Use case
Let's consider an example in which you want to verify that your payment system works correctly. The system reads events from the payments topic and, if the payment is successful, publishes events to the payment-confirmation topic.
So, to make sure the system works, you can use ReadyAPI to simulate a producer and publish payment events.
Tip
If you want to simulate a complex scenario, you would usually also want to simulate an event consumer to check how the event is processed. In our example, we could use ReadyAPI to verify that the payment system published a message in the payment-confirmation topic.
Produce events
1. Add a Kafka API to the project
To start testing Kafka APIs, you should first add one to the project. To learn how to do it, see Adding a Kafka API to the Project.
2. Create a test step
To produce a Kafka event in ReadyAPI, you use the API Connection test step based on a Publish operation:
Open a test case and add API Connection Test Step.
In the dialog that appears, select a Publish operation and click Add Test Step.
Note
In AsyncAPI 3.0, the Publish operation is replaced with Send. The workflow remains the same regardless of the AsyncAPI version you use.
Example 7. Adding API Connection Test Step.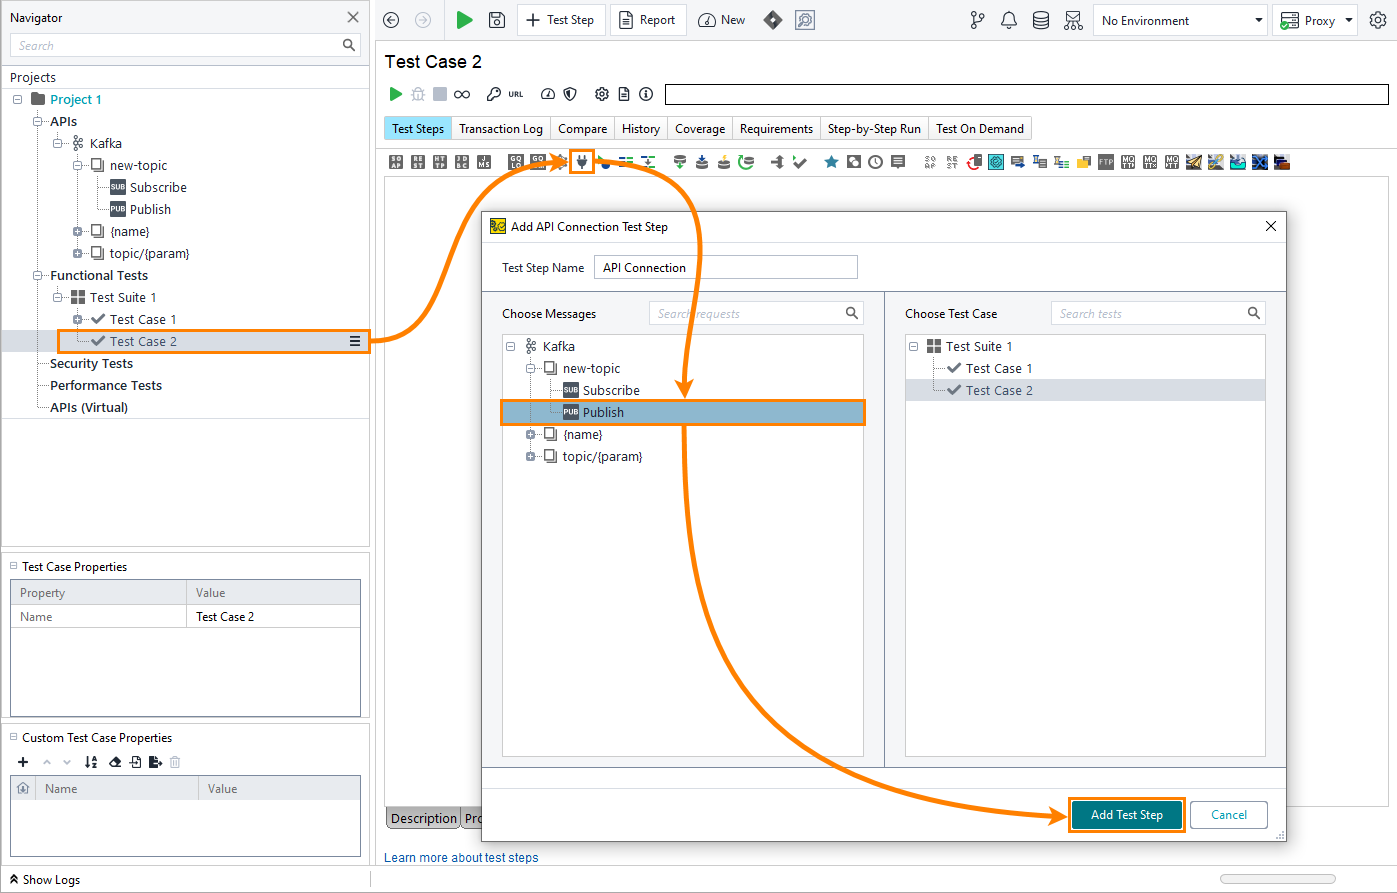
Alternatively:
Right-click a Publish operation in the APIs node in the Navigator and select Add to Test Case.
In the Add API Connection Test Step dialog, select a test case and click Add Test Step.
Example 8. Adding the Publish operation.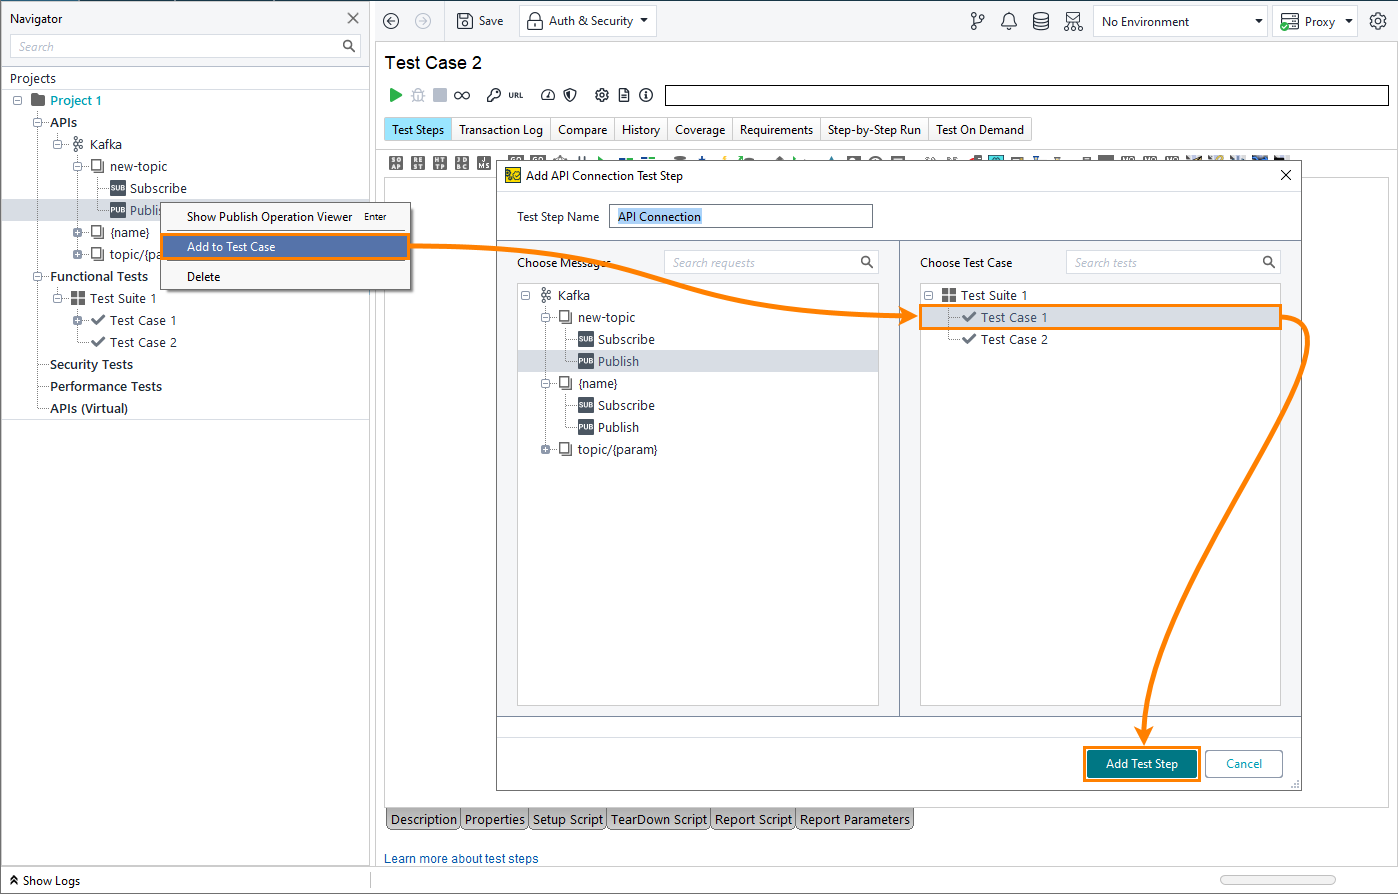
3. Send the event
To publish the event to the topic, enter the message in the Data field and select Connect. ReadyAPI will send the event and then disconnect.
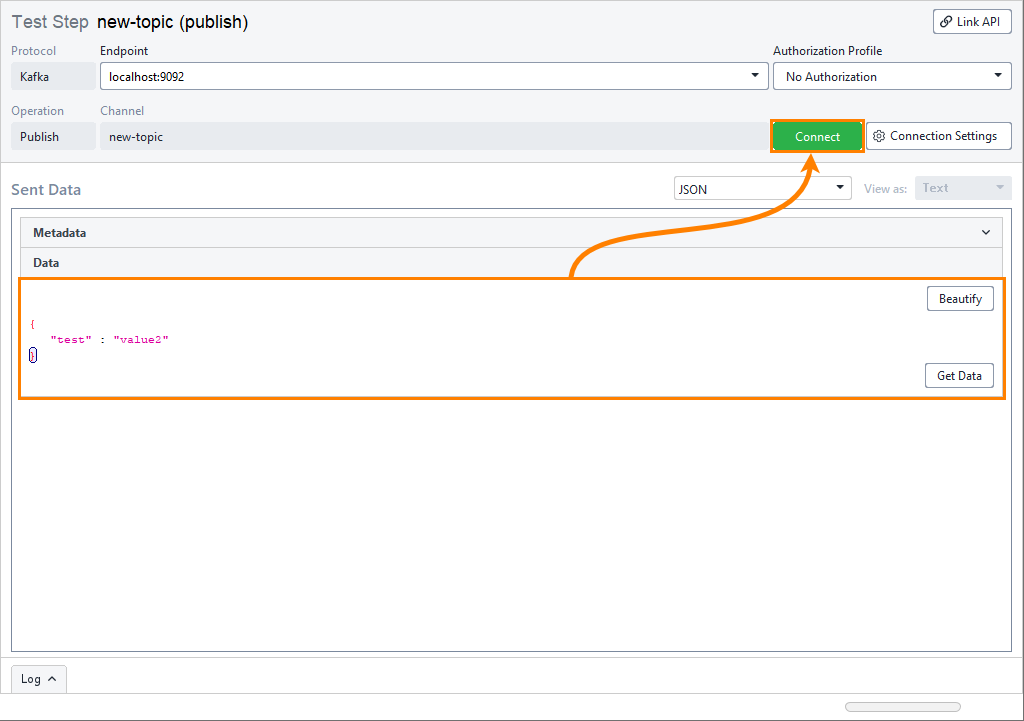 |
In the sections below, you can read more about connection settings and the message editor. Kafka authentication settings are covered here: Authentication in Kafka.
Test step settings
Test step toolbar
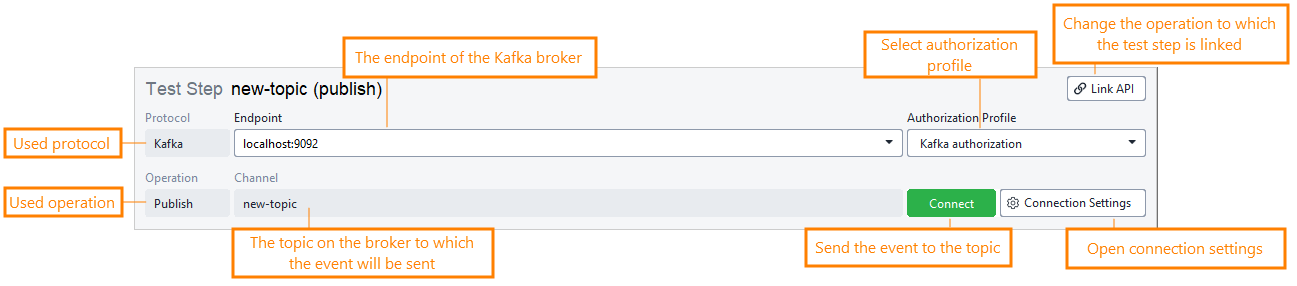
The test step toolbar contains settings that allow you to modify the connection and authorization settings for the test step:
 |
Setting | Description |
|---|---|
Protocol | The protocol used by the test step. For Kafka test steps, this is always KAFKA. |
Endpoint | The endpoint of the Kafka broker. |
Authorization Profile | The authorization profile used to authenticate with the broker. |
Operation | The operation the test step is linked to - Publish or Subscribe (or Send / Receive in AsyncAPI 3.0). To change it, click Link API. |
Channel | The topic on the broker to which the event is sent or from which it is received. |
Connect | Sends the event to the topic. |
Connection Settings | Opens the connection settings dialog. |
Connection settings
To open the connection settings, select Connection Settings in the test step toolbar.
Option | Description |
|---|---|
Confluent Settings | Used to connect to the Confluent schema registry. Only available when the JSON via Avro (Schema Registry) or JSON via Protobuf (Schema Registry) message format is selected.
|
Publish Settings | Other parameters that your Kafka provider might require. |
Reset to Default | Resets connection settings to the default. Default settings depend on the environment selected:
|
Property list
You can also change the test step behavior by using the step properties on the API Connection Test Step Properties panel in the Navigator.
Property | Description |
|---|---|
Name | The test step’s name. |
Description | Text that describes the test step. |
Message editor
The message editor is where you enter the actual message that the test step will send to the topic.
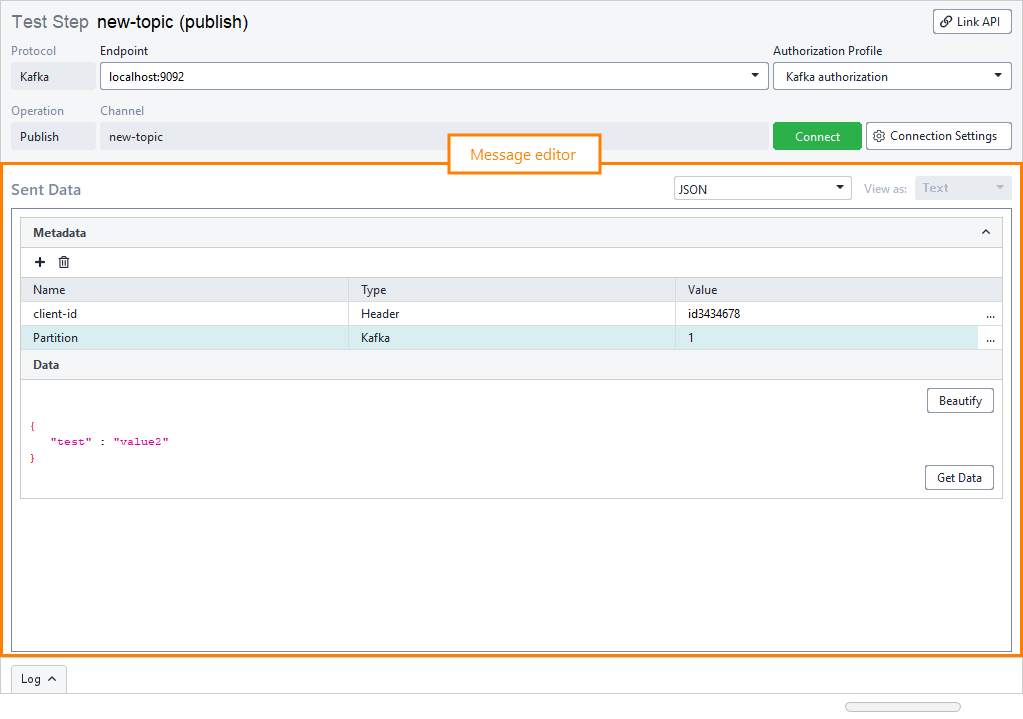 |
Message format – The format in which the message will be sent. Currently, two formats are available:
JSON – The message will be sent as a regular JSON.
JSON via Avro (Schema Registry) – The message will be serialized using an Avro schema stored in the Confluent schema registry. You can set up a connection to the schema registry in the Connection Settings.
JSON via Protobuf (Schema Registry) – The message will be serialized using a Protobuf schema stored in the Confluent schema registry. You can set up a connection to the schema registry in the Connection Settings.
Custom – The message will be serialized using an Avro or Protobuf schema stored in a file. You can set up a connection to the schema registry in the Connection Settings.
Note
When testing Kafka in ReadyAPI, ReadyAPI allows for fetching Avro/Protobuf key schemas from a file.
Metadata – The parameters that will be passed with the message. To add a parameter, click
 .
There are three types of parameters:
Header – Kafka headers sent with the message.
Path – Used to update path parameter values in the channel name.
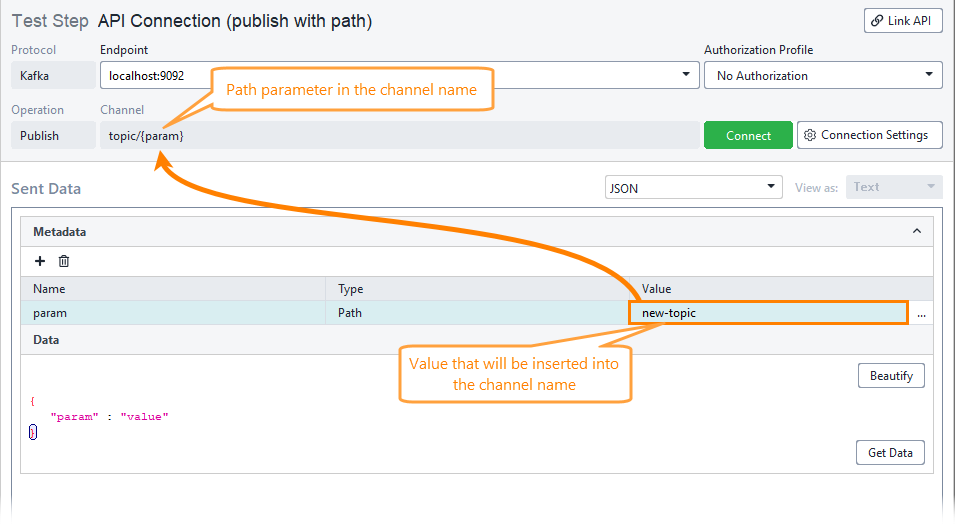
Kafka – Other parameters specific to Kafka. Currently, two Kafka parameters are supported:
KeyandPartition.
Tip
You can use property expansions to insert data into parameter values.
Data – The message itself in the JSON format.
You can insert data from other test steps or parameters into the message by using Get Data. To learn more about the feature, see Get Data Dialog.
You can also automatically format the JSON you enter in the field by clicking the Beautify button.