Adding a Kafka API to the Project
To start testing Kafka in ReadyAPI, you should first add a Kafka API to the project. You can import an AsyncAPI definition or create an API manually.
Import API definition
Click next to the APIs node and select Import API Definition.
Alternatively, right-click the APIs section in the Navigator and select Import API Definition.
Select where your definition is stored and click Import API:
My Computer - browse to the definition file on your computer.
URL - enter the URL of the definition.
Swagger - search for and select the definition from Swagger.
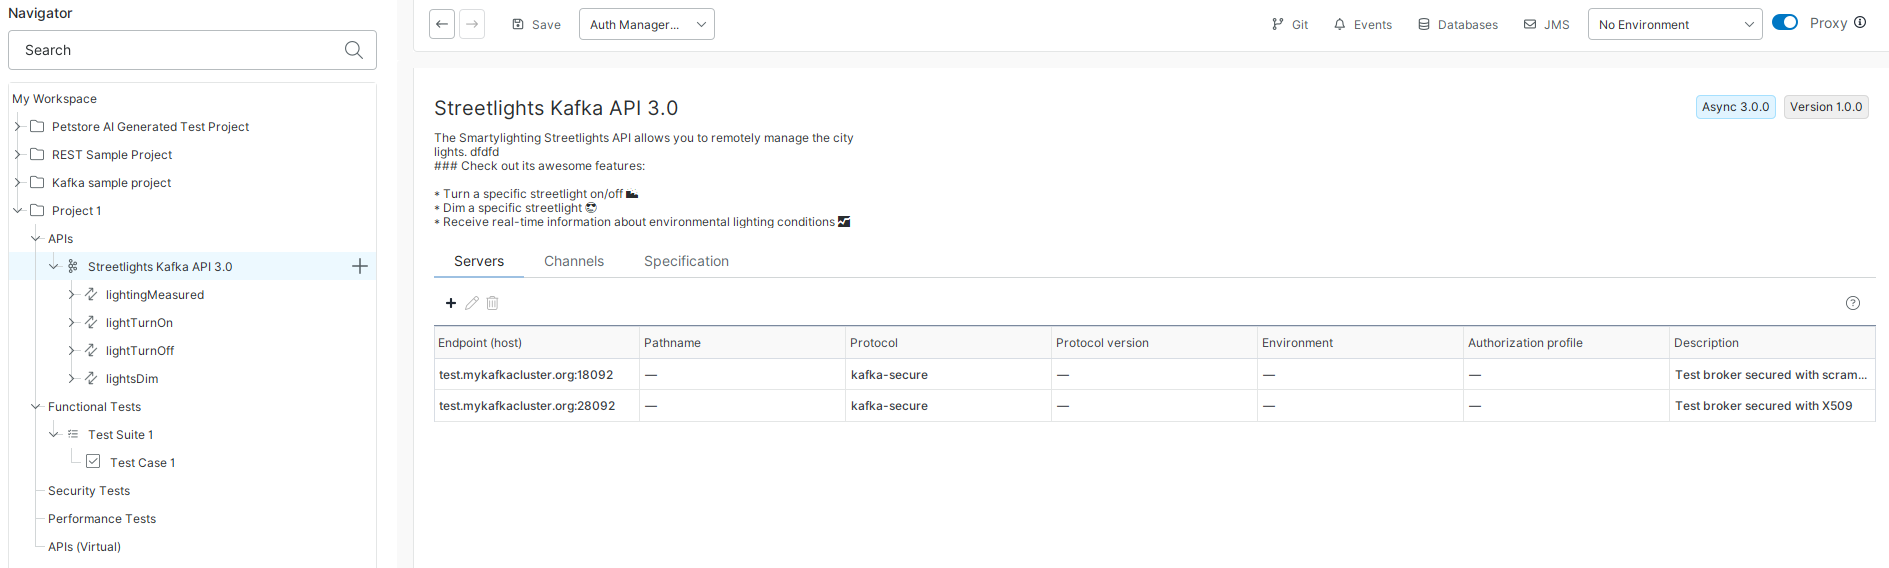
Select the imported API in the Navigator to view its definition. The panel shows the API name, description, and version badges, along with the Servers, Channels, and Specification tabs.
Note
ReadyAPI displays two version badges in the top right corner: the AsyncAPI specification version and the definition version. The AsyncAPI version badge is visible only for definitions imported in ReadyAPI 4.3.0 or later. Definitions imported with an earlier version of ReadyAPI do not display this badge.
ReadyAPI now uses the actual operation names from the AsyncAPI definition in the Navigator, for both AsyncAPI 2.x and 3.0. If you open an existing project in ReadyAPI 4.3.0, operation names in the Navigator may differ from what you saw before.
Create API definition
Tip
The built-in Kafka Sample Project contains a test case that simulates a publisher and a subscriber interacting with a topic. You can open it from the Sample Projects section on the Projects tab,or from the Dashboard tab. For more details, see Sample Projects.
Add a Kafka API to the project.

To learn more, see Adding More APIs to Existing Projects.
Specify the service’s endpoints and authorization, if needed.

To learn more, see Managing Kafka APIs.
Populate the API with the needed channels.

Add the API Connection test step to a test case.

To learn more, see API Connection Test Step.